Smart Azan Clock and Prayer Times Display by AlAleem Systems

I’m glad to introduce our first Smart Consumer Product, the Smart Prayer Times Display & Azan Clock through our Startup AlAleem Systems. This is a first of it’s kind Smart WiFi Enabled IoT Prayer Times Display & Azan Clock for use in Masjids, Islamic Centers, Schools, Offices, Industries & Homes.
Key features include:

  • Smartphone/PC Controlled:
    • Use your Smartphone/PC to update Jamath Times & configure the Display directly from Browser without installing any Apps
  • WiFi Enabled
    • The display itself becomes a WiFi Router/Hotspot and doesn’t require any external WiFi Router or Internet to operate or update data
  • International Taqweem Support
    • This display works for most Taqweems (prayer calculation methods) and supports thousands of cities
  • Firmware Update Over the Air
    • The Smart Display supports upgrading of device firmware directly from Phone wirelessly as and when newer features are available, thereby making device in sync with newer developments and additional features as and when available
  • Jamath, Azan Times and other Info
    • The Smart Display Shows Start & End times of Prayer, Jamath Times, Ishraq Time, Saher/Iftar Times in Ramazan, Date, Masjid/Org Name, etc
  • Customizable Modules
    • [Coming Soon] Add on modules allow to extend the functionality of Display as required. Eg: Custom Languages (Urdu, Hindi, etc), Scrolling Text, etc


Please visit us at https://alaleem.com for more product details and to place an Order Online.

Your Feedback – Automated WiFi Enabled (IoT) Salaah/Namaz (Prayers) Timings Display

Assalamualaikum,

Thank you for taking the time and effort to review this Project and provide your feedback and insights. You can skip the Background section below and jump to the main content. JazakaAllahu Khairan for your efforts.

WasSalaam


Background:

It was sometime in 2012 when I saw this lovely Salah Indicator in Jame Masjid, Mallepally, Hyderabad, India: Continue reading “Your Feedback – Automated WiFi Enabled (IoT) Salaah/Namaz (Prayers) Timings Display”

Recursive batch Script to get latest/static file name – SyedTips – 7

If you followed my earlier tip, notice how I always passed in Image.png as an image file into tesseract to get a text value? This is totally fine if you can source static Image files and make sure they are available at a particular location.

However, what if you’re using a live camera that saves a stream of Images? I used mjpg-streamer to live stream images on a web browser and also save them on a Raspberry Pi.

Following is the bash command that captures images from a USB WebCam and streams it over:

./mjpg_streamer -i "./input_uvc.so -r 640x480 -f 1" -o "./output_http.so -w /usr/local/www" -o "./output_file.so -f /home/pi/Camera_Output -c /usr/bin/mjpg-streamer-overwrite.sh"

The above command does the following 3 things:

  1. Stream Images over the Web/Browser
  2. Save Images to a local folder on the Raspberry Pi
  3. Invoke a custom Script

Here’s how the local folder containing the saved streamed image files looks like:

filenames_sample

Now here’s the challenge: Firstly, tesseract can only take in a defined fileName as an argument and since we’re invoking tesseract from Python, we can’t simply use a script to get the latest file name and pass it as a parameter.

So here’s what I did to solve this: Get the latest file and rename it to Image.png in that same folder. So at any instance, the latest captured image file is always Image.png. Now, simply pass this as an argument into tesseract and all’s done 🙂

I used the following code snippet to get latest file pointed as Image.png:

# move the temporary file to a given filename
cd /home/pi/syed

cp -f -T `find -type f -name '2015*' -printf "%C@\t%P\n" |sort -r -k1,1 |head -1 |cut -f 2-` /home/pi/syed/Image.png

I saved this snippet into mjpg-streamer-overwrite.sh which is being invoked on every Image capture as shown earlier.

P.S: A more detailed script that shows debug messages:

#!/bin/bash

# comment out the following line to disable messages
#VERBOSE=1

if [ $VERBOSE ]; then
  echo -e "Rename script started at:\t$(date)";
  echo -e "Parameter \$1 is:\t\t$1"
  echo -e "current directory is:\t\t$(pwd)"
  echo -e "move command is:\t\tmv -T -f \"$1\" 'Image.jpg'"
fi

# move the temporary file to a given filename
cd /home/pi/syed
cp -f -T `find -type f -name '2015*' -printf "%C@\t%P\n" |sort -r -k1,1 |head -1 |cut -f 2-` /home/pi/syed/Image.png

RES=$?
if [ $VERBOSE ]; then
  echo -e "move command returned:\t\t$RES"
fi

Thanks 🙂

Invoking Shell commands from Python – SyedTips – 6

While building an ALPR (Automatic License Plate Recognition) System on a Raspberry Pi in 2013, I came across tesseract  which is a very powerful OCR (Optical Character Recognition) tool.

Tesseract is a command line tool which means it has to be invoked as a command from the shell/terminal (and it works on both Windows and *nix):

tesseract imagename outputbase [-l lang] [-psm pagesegmode] [configfiles...]

Since my main image capture and trim script was based on Python (triggered from a WebPage), I had to find a way to invoke tesseract from within Python. At first, I looked out for python libraries and wrappers of tesseract and had a hard time getting them to run on the Raspberry Pi.

Eventually, I wondered if there was a way to invoke shell commands from Python; and yeah!

Using subprocess, you can do just that:

import subprocess
subprocess.call(["tesseract", "/home/pi/syed/Image.png", "/home/pi/OpenCV/OCR_Data"])

Pass each argument to the invoked command separated with , in “”

Thanks.

IoT project ideas and use cases – SyedTips – 5

One of my acquaintances pinged me today asking for suggestions/ideas for his Engineering project themed around IoT. At first, I gave my standard reply:

iot_suggestion

And at that instance, it hit me to get ideas from use-cases provided by leading IoT Companies such as the Kaa Project (http://www.kaaproject.org/) and many others.

I’ve compiled below a list of IoT Project Ideas for your Engineering Projects or IoT use-case demos and have listed them below with links back to the source. You can use these as a starting point and generate your own use cases or directly implement one of these. I’ll try adding in more use cases from other vendors. Happy Making (instead of ready-made buying :P). Ohh, it’s Engineer’s Day today. Happy that.

IoT Use Cases – Kaa Internet of Things platform

kaa_iot_use_cases
Source: http://www.kaaproject.org/iot-use-cases/

The following use-case examples were taken from: http://www.kaaproject.org/iot-use-cases/


Continue reading “IoT project ideas and use cases – SyedTips – 5”

Adding a (extra) Hardware Serial Port using I2C on Arduino or other MCU – SyedTips – 3

One cool thing/feature I learned from the Arduino Uno WiFi board was how to implement/add an extra hardware Serial Port to the existing MCU using a I2C to Serial Bridge.

The Atmega328P MCU on the Arduino Uno has only one Hardware Serial port. If we’re interfacing a Serial Device to this MCU and would also like to use Serial debugging, an option is to use SoftwareSerial (which comes with it’s own set of issues and limitations). A better option is to have an I2C – Serial Bridge that’d allow the host MCU to interface with another Serial Device.

The Arduino.org team did this splendidly and used this SC16IS750IBS to have the MCU talk with the on-board ESP8266 through this I2C to Serial Bridge.

img_20160910_232432_905

i2c_uart_pin

You can read more about the implementation and details on the product page: http://www.arduino.org/products/boards/arduino-uno-wifi

Thanks.

Combining multiple ESP bin files into 1 for production – SyedTips – 2

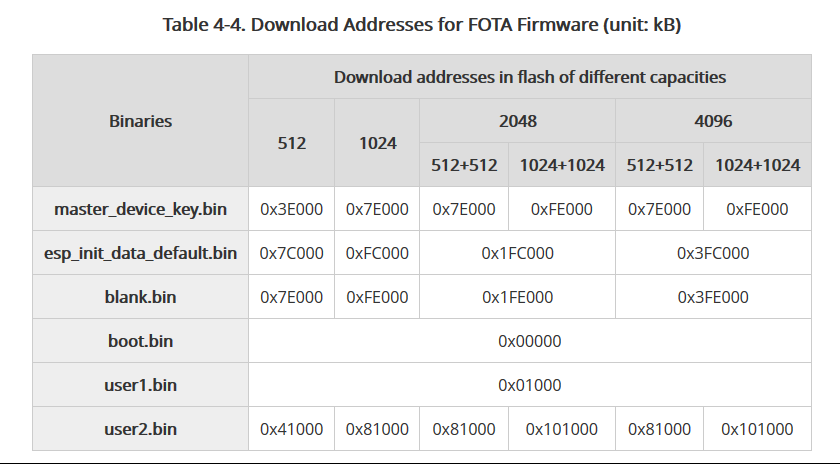
If you natively develop firmware on the ESP8266, you’d eventually have to flash multiple bin files to different locations on the Flash Module of ESP8266 (or on SoC itself for ESP8285).

flash_mem_allocation

In order to create a single bin file, populate the individual bin files at their respective addresses in the official Espressif Flash tool as shown below:

Flash_Tool.png

Once done, select the checkboxes of the individual files that you’d like to include and hit the Combine Bin button shown above:

That should give you a single bin file as shown below:

single_bin_file

Now, you can simply use the Flash Tool itself or esptool.py/exe to flash this single bin file at address 0x00000.

I found a simple batch file online that uses esptool.exe (for Mac/Linux, you can use esptool.py with the proper arguments) to flash bins to the ESP.

The following code goes into the batch file that calls the esptool.exe and flashes the bin file (mare sure esptool.exe and the bin file are in the same folder).

@echo off
set /p comport= Comport (example 3, 4, ..)           :

echo Using com port: %comport%

esptool.exe -vv -cd nodemcu -cb 115200 -cp COM%comport% -ca 0x00000 -cf at.bin 

pause

The above script will simply ask the user for the COM port of the USB-Serial Cable/Adapter to which an ESP (in boot-mode) is connected and flash it.

The above method can be also be used if you’re provisioning users themselves to flash/update firmware over to the ESP if FOTA is not implemented (at least that’s how I plan to use it for my ESP dev board).

Thanks.

Externally powering the DragonBoard 410C – #SyedTips – 1

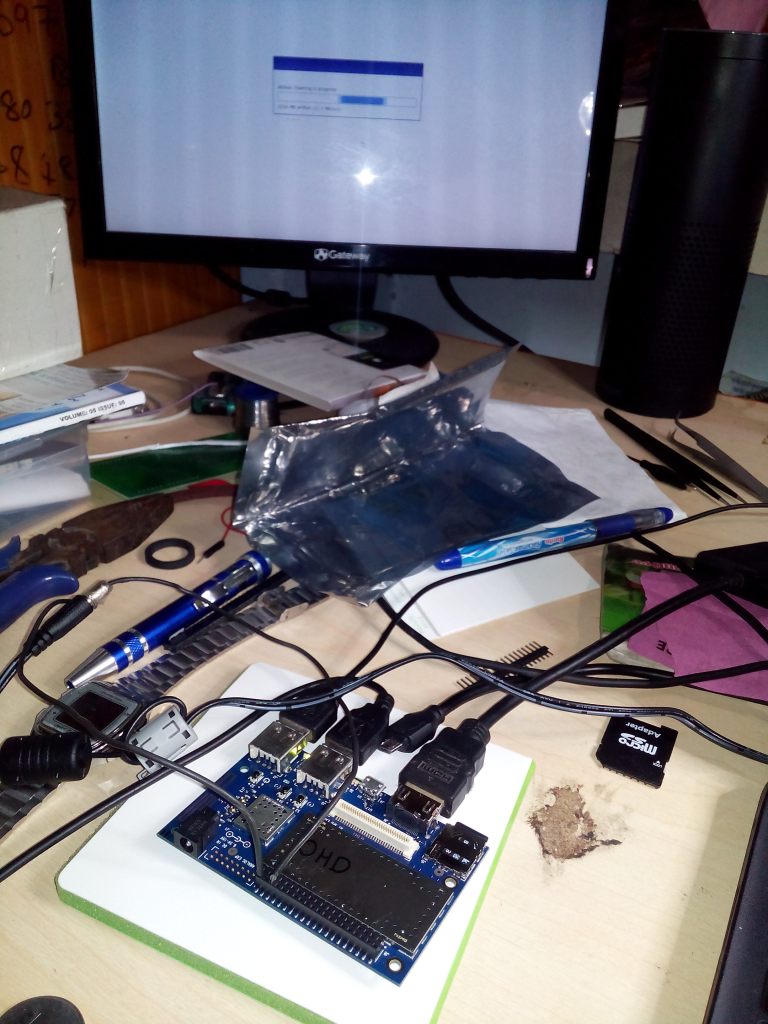
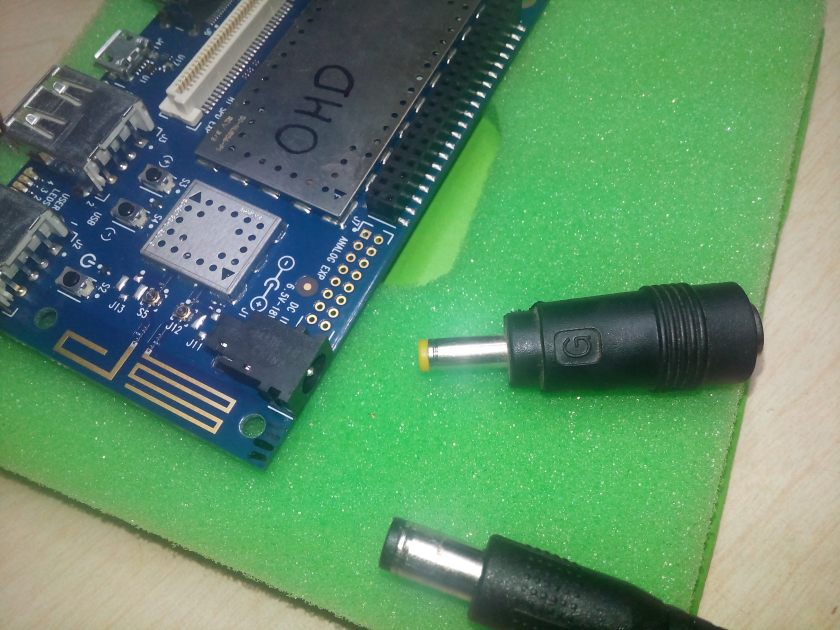
I recently got access to a DragonBoard 410c and started hooking it up at 4 in the morning. After flashing the OS over to the SD Card, to my utter dismay, the DC input jack wouldn’t allow a standard DC barrel to fit in. I was furious since this barrel adapter didn’t come with the box either.

img_20160909_011728 img_20160909_011901

However, there’s always another way 🙂

Now, there’s a mini USB port, which *can* be used to power up from a 5V USB port. However, the 410C doesn’t support powering up the board through this 5V port. Here’s why it doesn’t:

usb_port_power

Notice the above section talk about using an onboard SYS_DCIN pin available on the Low Speed Expansion Connector that can be used to power the board externally.

dcin

Use any one of the SYS_DCIN and GND pin and wire it up to DC Adapter  with SYS_DCIN going to the +ve terminal. These pins are those adjacent to the Analog Expansion. Supports 6.5V to 18V.

img_20160908_050912

And the Dragon Breathes at 5 in the morning! (notice the first boot from SD Card flashing process taking place. After this, you can simply remove the SD card as the OS is now flashed onto the onboard eMMC).

img_20160908_050902

Now that we got it running, I figured out there has to be a better way to do this.

DC-DC Connector-Converter:

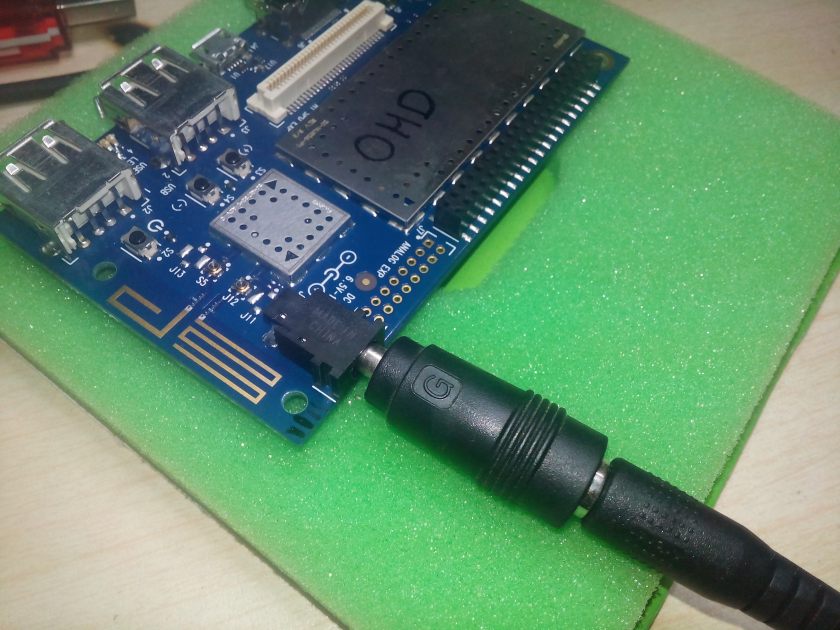
I got one of these this evening from a computer store and it’s marked “G”. These are usually called as Laptop Charger pin adapters and should be available at most computer/spares stores. This should now do the trick in a more aesthetic way.

img_20160909_011933 img_20160909_011951 img_20160909_012400_024

Thanks 🙂

Building IoT Devices – From Prototype to Production – India

This was a small talk I gave on World IoT Day (April 9th, 2016) at Collab House about my experiences and findings of IoT Prototype –> Production in Hyderabad, India.

I don’t have much info in the Slide Deck itself and hope to do a detailed writeup sometime. This should serve as a brief Intro.